Pressure washing stone and brick surfaces can transform their appearance significantly, but it requires careful handling to avoid damage and achieve optimal results. Here’s an in-depth guide on how to effectively pressure wash stone and brick:
Inspecting the Surface
Before you begin pressure washing, thoroughly inspect the stone or brick surface. Look for cracks, loose mortar, or any areas that may need repair. Addressing these issues beforehand ensures that the pressure washing process won’t worsen existing damage. Use a small brush or scraper to remove any loose debris or dirt.
Choosing the Right Pressure Washer
Selecting the appropriate pressure washer is crucial. Opt for a machine with medium to high power, ideally between 2000 to 3000 PSI (pounds per square inch). This range provides sufficient cleaning force without being too aggressive, which could potentially damage the stone or brick.
Selecting the Appropriate Nozzle
Choose a nozzle with a wide spray pattern, such as a 25- to 40-degree nozzle tip. This wider angle helps distribute the water evenly over the surface, reducing the risk of causing etching or damage with concentrated pressure. Start with a broader angle and adjust as necessary based on the surface’s condition and the effectiveness of cleaning.
Pre-soaking the Surface
Before applying detergent, pre-soak the stone or brick surface with water. This step helps to loosen dirt, debris, and any organic matter stuck on the surface. Use a gentle spray to saturate the area thoroughly. Allow the water to penetrate for several minutes before proceeding with cleaning.
Applying a Suitable Detergent
Choose a detergent specifically formulated for pressure washers and suitable for stone and brick surfaces. Avoid using harsh chemicals or acidic cleaners that could damage the materials. Dilute the detergent according to the manufacturer’s instructions and apply it evenly across the surface using a low-pressure setting on the washer.
Adjusting Pressure Washer Settings
Start with a low-pressure setting to test a small, inconspicuous area of the surface. Gradually increase the pressure as needed, always staying within safe limits to avoid damaging the stone or brick. Pay attention to how the surface reacts to the pressure and adjust accordingly to achieve the best cleaning results.
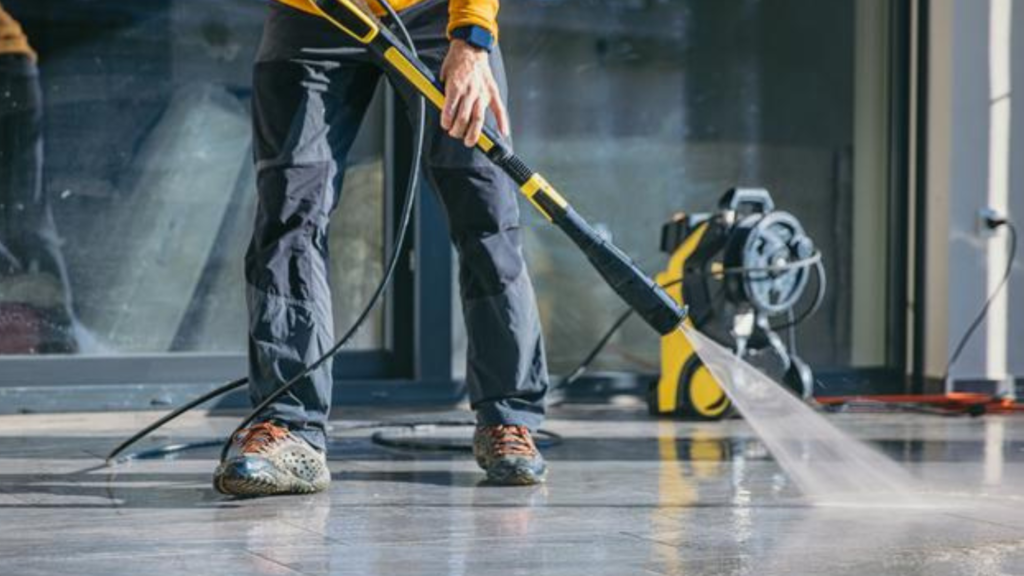
Maintaining Proper Distance and Technique
Hold the pressure washer nozzle about 1 to 2 feet away from the surface at all times. Use gentle, sweeping motions to clean the entire area evenly. Avoid holding the nozzle too close or at a sharp angle, as this could cause damage or leave marks on the surface. Keep the nozzle moving to prevent overexposure to high-pressure water in one spot.
Rinsing Thoroughly
After applying detergent and cleaning the surface, thoroughly rinse it with clean water. Use the same wide-angle nozzle to ensure all detergent residue is removed. Pay special attention to corners and crevices where detergent may accumulate. Proper rinsing prevents streaks or discoloration and leaves the surface looking clean and refreshed.
Allowing for Drying Time
Allow the cleaned surface to air dry completely before assessing the results or applying any sealants or protective coatings. Drying time may vary depending on weather conditions, but ensure the surface is completely dry to avoid trapping moisture, which can lead to mold or mildew growth.
Inspecting for Necessary Repairs
After cleaning, inspect the surface again for any signs of damage or areas that may require repair. Look for cracked bricks, loose mortar joints, or areas where the surface may have been compromised. Addressing these issues promptly helps maintain the structural integrity and appearance of the stone or brick.
Conclusion
Pressure washing stone and brick surfaces can effectively remove dirt, grime, and stains, revitalizing their appearance and enhancing curb appeal. By following these detailed guidelines and using proper techniques and equipment, you can achieve excellent cleaning results while preserving the integrity and aesthetic appeal of your stone or brick surfaces. Remember, thorough preparation, careful execution, and regular maintenance are key to prolonging the life and beauty of your exterior surfaces.